This was a super quick project that I whipped up before work the other morning.
It's so easy to do that I'd recommend making, oh, about 153 of them!
So here's whatcha do
Start with an old knit shirt of some kind. I had already cut the sleeves off this for something else.
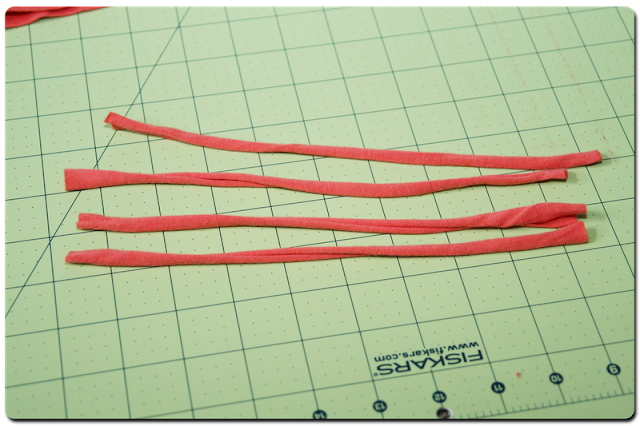
I cut 4 strips that were an inch wide and 8 inches long. I measured my wrist to be 6 inches around then added a couple inches that I thought I would lose in the braiding process. After you cut them, pull the ends to stretch them out. I should mention that this won't work very well unless you cut your fabric the right way, so tug and pull on your shirt beforehand to figure out which way to cut.
Since I'm all about doing things the easy way, I just hot glued the strips together at the end
Use a binder clip {or whatever clip you want} and clip to a book {in this case, Mr.'s accounting textbook} and start braiding!
When you are done, hot glue the other ends together
Fold together and , yeppers, you guessed it...hot glue the 2 ends together
Cut another strip about 2.5 inches wide and 4 or so inches long, then fold over the sides to make a tube
Glue on the inside of the bracelet when your ends meet, wrap it around and glue to finish!
And voila! A super cute, super comfy, super quick bracelet for summer!
Now go cut up all your old knits and get to braidin'!
Much Love~
Meredith


I love this! Your photography is phenomenal.
ReplyDeleteYour newest follower,
Abby
i---create.blogspot.com
This is a fabulous idea and I love the look!
ReplyDeleteDo my eyes deceive me or did you braid with four (*mind explodes*)...
Would you be willing to share this at our Weekly Playdate link party? This week's party is here: http://beneaththerowantree.blogspot.com/2011/07/playdate-link-party-blog-hop-16-all.html
Cheers,
Lori
Come & Play :: Playdate
www.beneaththerowantree.com
This would be so much fun to make in a group! Always looking for things to share with my mommy friends!
ReplyDeleteoh my goodness, i am in LOvE!
ReplyDeletei can't wait to go through my old shirts and make some of these babies!
super cute project and LOvE the tutorial.
i have a blog where i feature tutorials just like yours, would it be okay if i featured this project?
take and look and my blog and let me know what you think!
greensubmarinediydesign.blogspot.com
You are awesome to have thought of this! Now I want one & since you did such a good job of showing me how to do it, I think I'm gonna give it a shot :)
ReplyDeleteI love your blog btw! Following you for sure :)
I'm so ready to try this!!
ReplyDeleteThis is a great. My daughter and I did something VERy similiar to this. SHe was learning to braid however so it didn't turn out quite as neat and nice but she wore it for a long time. Thanks for such a great tut!
ReplyDeleteCute and love this color. Love the way you finished this off with the tube.
ReplyDeleteWonderful! I really like this and since my kids are grown I have tons of old T shirts laying around. Can't wait to try this.
ReplyDeleteSo glad you shared at Thrifty Thursday!
Love, love, love these bracelets!!! Pinning them - these would be great not only for us grownupish peeps, but also for my 12 y old daughter to make her friends for holiday sersis, etc. Found you thru Flamingo Toes today - u have a fab blog here! I'll be following...
ReplyDeleteOh! And come see me at
ReplyDeletehttp://sceneofthegrime.blogspot.com
Love to have you visit!
What a cute easy bracelet. Well done!
ReplyDeleteLove the coral! I actually made a bracelet with the same technique but put velcro on the ends because mine was not stretchy fabric. Great minds think alike! Thanks for linking up with DIY under $5!
ReplyDeletevery cute idea!
ReplyDeleteCute! I am going to try this some time. Thanks for sharing this with us:)
ReplyDeleteUm, so how do you braid with 4 strands? Call me a newbie, but I can't seem to figure it out just by looking.
ReplyDelete